The Blue Berets of Paris
This is a re-post from a couple years back that ties into a post I'm going to post tomorrow... I added some more blue beret shots of James from the last trip we went on together this time last October. The kids grow so fast...
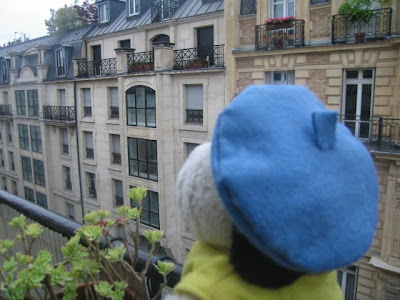
For our stay in Paris I thought a fitting project for Olaf and Grippy would be to make each of them a blue beret and take photos of them all over Paris. The beret is such a symbol of frenchiness, I just had to do it! Associated with European art and romance, they began as the headgear of choice for early 19th Century Basque shepherds. Artists, writers, and bohemians adopted it later in the century as a gesture of rebellion against the status quo. As Olaf and Grippy are natural born rebels, this was a perfect way for them to show their true colors. Vive la resistance!
For our stay in Paris I thought a fitting project for Olaf and Grippy would be to make each of them a blue beret and take photos of them all over Paris. The beret is such a symbol of frenchiness, I just had to do it! Associated with European art and romance, they began as the headgear of choice for early 19th Century Basque shepherds. Artists, writers, and bohemians adopted it later in the century as a gesture of rebellion against the status quo. As Olaf and Grippy are natural born rebels, this was a perfect way for them to show their true colors. Vive la resistance!
 |
| This guy is turning 4 this week. How time flies... (violin please) |
 |
| On Olaf, Chris and my "first" child- just pretend, but we really had some great jokes stem from it and laughter is the glue to a relationship. |
 |
| Didn't see many berets this last trip to Paris, but did see this lady with five hats on. Great outfit, non? |
 |
| James at the park behind Les Invalides in his blue beret. |
 |
| Oui, how can I (h)elp you? |
 |
| And at La Duree! |
O.k.! My walk down memory lane is over, here are the directions:
- ¼ yard felt in the color of your choice
- Scissors
- Needle and Thread
- 2 Round objects for tracing- one bowl for the full size of the beret and one smaller interior part that fits around the head. I used kitchen bowls.
- Pen
- A few pins for pinning the circles together
1. Trace two large circles onto the felt.
2. Cut out both circles, leaving about ¼ inch seam allowance in addition to the traced lines. Cut out a 1 ½ inch x ¼ inch rectangle as well.
3. Take one of the circles and trace a smaller circle in the center of it. Cut out center.
4. Pin the two circles together along the larger circle markings.
5. Stitch the two circles together on the traced lines.
6. Turn right side out and find the middle of the top of the hat.
7. Add folded rectangle to the center by folding it in two and stitching it onto the center of the top of the hat. Et voila!


Comments
I followed you from Jenny's blog.
I love your work and these photos of Paris!
~ Gabriela ~