Posts

Showing posts from 2010

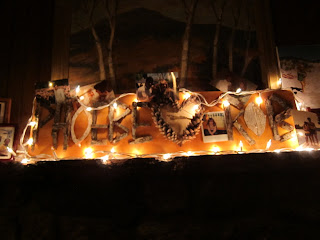
Merry Christmas Garland

Image
Want your house to scream Merry Christmas without running up the electricity bill or supergluing reindeer to the roof? Express yourself with these easy-to-make quilted holiday letters. In a few minutes you can add a festive touch to any mantle or, if you haven't got one (and, honestly, who has a mantle these days...?!), give that less-than-Noble Fir a voice by attaching some pom-poms and hanging these letters as ornaments on your Christmas tree. But don't stop at Christmas. This project's technique can be used anytime. Whether announcing a party or decorating a child's room, let your style speak with this easy to-do, and impossible to ignore, anytime garland.  Step 1:  Iron double-sided Wonder-Under  to quilted fabric. Step 2:  Iron parchment paper to the wrong-side of patterned fabric and trace 3 1/4 inch letters on the parchment paper.    Make sure the letters are backwards so the letter appear forward on the garland. Step 3:  Cut out letters and peel off t

Reinvent Christmas!

Image
If you have extra fabric and trim lying around, use it to wrap presents.  I hot glued the fabric to the boxes to make sure they didn't move about, but they could also be taped with strong double stick tape.  The fabric can be reused for all sorts of things. I'm not a great knitter but the woman who made this sweater from Goodwill was!  I took it and was able to make two big stockings from it just one sweater just by tracing a stocking I had and sewing up the sides.  There was also enough knit left to cover one of my holiday houses in the UCLA Commons Window.

Salt Dough Christmas Ornaments

Image
Hand-shaped ornaments painted and on the tree Cookie Cutter Ornaments Pre-painted baked cookies First coat of paint Salt Dough Ornaments are a simple, inexpensive and beautiful addition to any Christmas tree, not to mention a great project to do with the kids.  I got my son involved in the painting of them, and our tree has never looked the same! Ingredients: 2 cups flour 1 cup salt 1/2 cup water Baking sheets Acrylic paints, glitter glue brushes. Directions: 1.  Combine ingredients by hand, knead until well blended and wrap tightly with plastic so dough does not dry out.  Take only the portion you are using out at a time.  If it gets dry add a little water or, if too wet, add flour. 2.  Shape either by hand or with cookie cutters.  I tried both and really liked the way both turned out (although using cookie cutters was much faster).  Poke holes at the top of the ornaments.  Keep in mind they shrink a little when baked. 3. Bake for 8 hours at 200 degrees

Girls D.I.Y. Class

Image
Another session of my D.I.Y. class at UCLA Family Commons has just wrapped and I wanted to share the adorable projects my students made with everyone! Colorful, cute, and one of a kind  Sculpey necklace.   "Sparkles on a Half Shell" project from my second book  Beadalicious ! And Soapsicles!  Soap in popsicle molds.  They had a great time mixing the colors.

Holiday Snow Village Window

Image
Happy Holidays! I made this winter wonderland for the UCLA Family Commons  window, and it was the most fun I've had doing display in a long time!  Scrap ribbon, felt, buttons, shrunken old sweaters, sequins, and odds and ends...oh my! What a great excuse to go digging through all the little bits I've squirreled away all these years.  I'm so glad I'm such a pack rat.  I found awesome trim that I didn't even know I had (made of wood bits and beads... see bottom right blue house).  The houses are made of cardboard templates that I found online .  I cut the roofs out of wood (with a hack saw) and stained them with a rag, then cut a paper template of the front of the house that just wrapped a little around the back (since the back is unseen), and used that as a guide to cut the sweaters the correct size.  (I didn't want to waste my precious shrunken sweaters on the back that wouldn't show...I mean, duh!).  All the trim is hot glued in place.  The buttons I sewed

Halloween Haunted House

Image
A skeleton butler with glow sticks greeted guests.  Purchased at www.orientaltrading.com Spider webs lined a dark hallway, gummy spiders dangled from the web in strategic places and plastic cockroaches were strewn across the floor.  I found this Hillary Clinton mask at the 99 cents store, stuck it  on a pole, added some cardboard tubes for shape, and draped fabric around it to form a body. Death by reading is what happened to this poor old soul!  It's hard to see his bulging glow in the dark eyes.  Again, I used a rubber mask and a head form on top of bags of fabric. Three styrofoam balls attached by toothpicks where draped with fabric to make ghosts.  I hung them by fishing line by wrapping the line around the center of the round ball, taping it in place, then running the fishing line through the top of the fabric "head" of the ghost. See the spooky ghosts on the left!  I left the ladder up and made it  a feature.  The best thing about the haunted house was the table sca

Grippy's Birthday Party

Image
Favors included beads, pom poms, a key chain, and some fabric.  My friends are so creative, I'm interested to see what they will make of it all. Of course, there was a crafty station for safari hats, masks, and headbands for the kids. For the living room, I made a simple construction paper banner with a 5x7 pad of construction paper, making each letter the size of one page and some string and tape. This simple banner I made with the Cricut cutting out each individual letter, 3 1/4" cardboard circles, then gluing the letters to the circles and taping them to string. I had a sheet of 12 round 2 1/2" sugar labels printed at Gloria's Cake Supply .  The sheets are $10.95 each and must be warmed over a toaster over so the sugar lifts off easily.  I botched a few learning how to get them off.   Simple logo cupcake flags, and grass border to go with the hint of a safari theme. No Venice birthday party is complete without a jumpy house!

Back to School Window at UCLA Commons

Image
Book tree made out of books curled  on top of one another held together by 3 inch drywall screws and L-bracketed to a plywood stand.  The background is book covers shingled over a canvas. Plywood frame supporting books from behind.  My good friend Miriam helping me. Javiera reattaching the canvas after it fell down due to heaviness.  Thank goodness for Javiera's core fusion classes. I wanted to make a tree made out of books for the back to school window and received a generous donation of books from my friend Karen at the Sherman Oaks Library .  It was a simple but pretty labor intensive project.  I have great friends that helped me with it or I would have been toast! Here is the how-to: What you need: Lots and lots of books Plywood base- mine was 3/4 inch thick and measured 3x4 feet Plywood support for the books- a 2x4 that was about 5 feet tall backing another 3/4 inch thick piece of plywood that measured  inches 10 x 8 feet tall. Drill 2.5 - 3 inch dry wall scre

Silk screening with the Mayor at UCLA Commons

Image
The Mayor of Santa Monica Bobby Shriver came to our DIY clothing class at the Commons!  The girls were so excited to meet the Mayor and he was especially impressed with my Platypus Lovers design!

Gold Notes on Vibe Magazine Cover

Image
These gold notes were a quick job that I almost didn't take.   I only had a 24 hour turn around so I had to figure out quickly how to make notes that looked like metal.  I used my Cricut and the Hannah Montana cartridge to cut chipboard into musical note shapes then layered several layers of cardboard using spray mount to glue them together.  After that I dipped them in resin and let them dry over night. In the morning I painted them with Montana Gold spray paint.  I've never used Montana spray paints before but the thickness and density of the gold color was quite impressive.  In the end they looked like metal although it might have been easier to make them out of clay.  I think these would make great Christmas tree ornaments and that is probably what the ones in the photo will become now that they are back in my posession!

Baby Sign Cards

Image
This is my latest published project- Baby Sign Cards for UCLA Commons Bookstore.  There are 44 signs total all using clay figurines to express the signs.  I used Sculpey clay baking the bodies but leaving the arms unbaked so I could move them to make the different signs.  So much fun to make and design their little outfits and shoes.  I even made one look like my husband Chris!  The best part was painting their eyes.  My friend Jess Begum taught me how to make the eyes really come alive with this technique that I will remember every time I need to paint eyes in the future.  The set retails for $15.95 at the www.uclacommons.com  store 1221 2nd Street, Santa Monica, CA 90401.

The Fairytale Boat Follies!

Image
The Fairytale Boat Follies! My Tinsel Workshop! 2 Originally uploaded by Lisa Kettell What a breathtaking project. I would love to make one of these!

Phoebe and Rob's Sign

Image
Phoebe and Rob had the loveliest lakeside wedding at the Migis Lodge in Maine.  It couldn't have been more perfect down to thunder clouds parting an hour before the wedding.  One of the bride's wishes was to have a sign with her and Rob's name on it made out of the woodsy elements from the property.  There were stacks of firewood for guests all over so it was easy to gather the elements we needed and make the sign.  Here is the how to: What You Need: 1/2 inch thick pine board, this one is 12" tall by 3 1/2 feet wide Wood stain and cloth Hot glue gun Wood chisel  Hammer Pine bark, birch bark, pine cones Directions: 1.  Stain the board and let dry. 2.  Gather up bark from pine trees and birch trees.  A little goes a long way.  We got so much in a matter of minutes and had enough extra to make another sign that said something else.   3.  Plan out where the letters are going, make a mark at the top of each letter, but don't write out the letters because

Photos from Signature Styles

Image
I am so lucky to have been chosen as a featured artist in one of   Jenny Doh's  upcoming book projects called Signature Styles.  Featuring 25 Crafters, a look into their studios, and a project just for the book.   Deborah Jaffe the infamous photographer who has shot for such big names as Martha Stewart and In Style Magazine shot it for me and did an amazing job.  Here is a sneak peek at the studio!