Posts

Showing posts from December, 2011

Husky Christmas Trees
Image
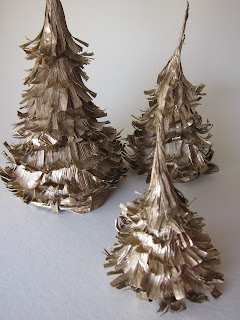
My friend Jessica and I have been doing some fun holiday crafts together.  She came up with the idea to use corn husks as trees- a brilliant plan since corn husks are available everywhere and are super inexpensive.  Jessica's are scalloped and pretty as you can see in the second photo.  All these Dr. Seuss books my 3 y.o. is having me read must really be getting to me, as I decided to make mine wild, bushy, and metallic. Wispy, piney, huskey Christmas trees. Jessica's sweet scalloped trees.  See directions at Hipster Teaparty . What You'll Need: Corn husks Kids party cone hats Hot glue gun Scissors Spray paint 1.  Disassemble and reassemble party hats to the shape/height of your liking.  I cut two down and heightened and narrowed one other.  Hot glue in place.  Glue a band of husk to the bottom of your hat to hide the bottom then cut a bunch of husks into 1 inch strips then notch every 1/4 inch.  Create a band at the bottom, curling outward, then work your way

Pop Up Frosty

Image
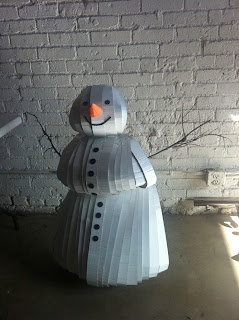
I recently got commissioned to create a 2-D snowman that looked like it would be at home in a pop-up book. For those looking for an alternative to Frosty's uniform circles, this untraditional geometric snowman is super cute and really easy to make with 2 inch strips of cardboard. What You'll Need: A hole punch 3 ft x 6 ft piece of cardboard, I got my cardboard, and they cut it into 6 foot x 2 inch vertical strips against the grain at my local art supply store, Mittel's .   White paint and a small roller Foam sticky sheets in black and orange Scissors or a die cutter with the appropriate shapes- I used my Cuttlebug 2 9 inch plywood rounds 1 5/16 inch steel 3 foot rod 5/16 inch drill bit Drill Frosty waiting for his hat. Overlap two 9 inch circles, using a 5/16 inch drill bit, drill a hole in the center of the rounds then insert pole.  It should stay put on it's own. Take strips of cardboard and bend with the grain of the cardboard.  Start with a strip